PREVIOUS: Munzee Event FAQs | NEXT: How to Purchase an Event Package
Are you hosting your own Munzee Event? While you can contact the Munzee Event Team for all event-related information at any time by emailing events@munzee.com, this step-by-step process might be able to save you some communication time. The following outline can be used to walk you through the entire event creation process. For further information regarding hosting Munzee Events, you can check out Event Host Rules and Regulations.
Event Creation Process
The first step in creating your event is to add the event to the Event Calendar: https://calendar.munzee.com/submit. To do so, you will just have to fill out the required information. Please keep in mind that this will make the event live on the calendar.
- Munzee Username: Be sure to use your Munzee account and email address
- Date: Fill out the date of your event, i.e. Dec 15, 2020
- Title/Description: Fill in the information for your event as needed

- If you continue to scroll down you’ll see the Additional Event Info section. The information in this section is needed if you purchase an Event Package, so please fill it out as accurately as you can. This information can be edited after the event has been created.
- The Go Live Date and Time can be edited any time but it is required on this form so please add one now. It can be adjusted at a minimum of 3 days in the future.
- To set your Event Indicator Location just click “Use My location” or search for a specific location. This will show up for any new event, but the Event Indicator will not be deployed unless a package is purchased. When a package is purchased, it will automatically pull these coordinates.
- You can also add up to three Co-Host Usernames on this page.
- Check the “I’m not a robot” box
- Click the “Create my event!” button

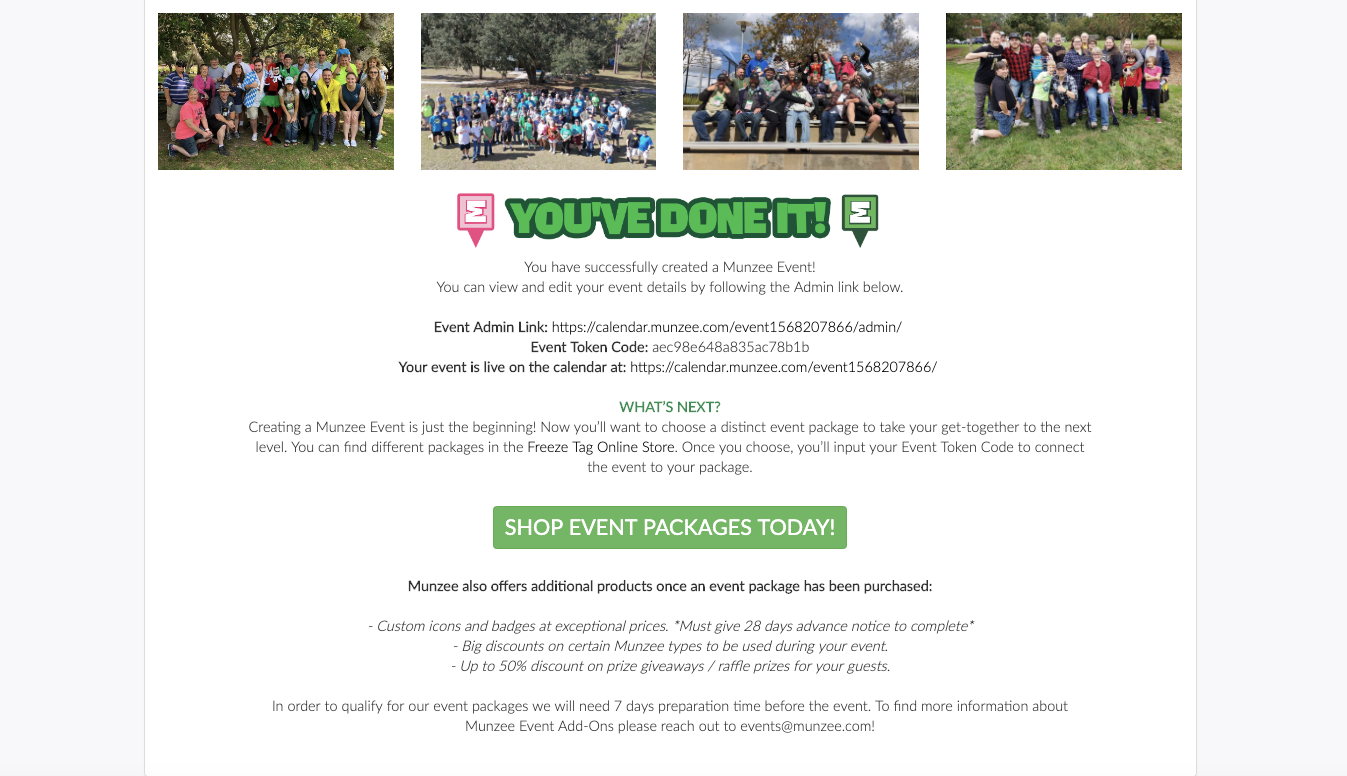
- Once your event is created, you’ll be presented a web page featuring your event information and the next steps for purchasing an Event Package.
- You will also receive this information in an email from Munzee with the subject: Munzee Event Created. This will go to the email address listed in the event creation form.

- This information includes your Event Admin Link, where you can edit your event details. This also contains an Event Token Code which will be used to purchase an event package from the store. There is also a link to the event’s public Calendar page.
- The web page and email also contain a link to the store Event Package Collection, which is where you will buy your Event Package.
Editing Event Details
- You can edit your event admin details at any point, including after an Event Package has been purchased.
- Click the Event Admin Link.
- You can edit all of the event details as well as the Event Indicator Location. You’ll be able to move it anywhere before it is deployed (AKA a package is purchased), but once it’s deployed, you can only move it up to 6,000 ft from the original location.
- You can also Cancel or Archive your event here as well.
- Cancelling an event will remove the event from the calendar and cannot be undone.
- Archiving an event will shut down all aspects of the event, but it will not remove it from the calendar page. You will no longer be able to access the event account. Once you archive your event, the hosts will be awarded any badges they earned. Your event will be auto-archived 24 hours after the Go Live time if you do not archive it before then. Please be sure your Go Live time is accurate.

Read on to discover more information about purchasing Munzee Event Packages!
PREVIOUS: Munzee Event FAQs | NEXT: How to Purchase an Event Package
